Preparing your development environment
1. Create a Cloud9 instance for development
1.1. Open the AWS Cloud9 console at https://console.aws.amazon.com/cloud9/.
1.2. Click on Create environment.

1.3. For the Name type amplify-workshop, and choose Next step.

1.4. For the Configure settings section, select the instance type t3.small and choose Next step.

1.5. For the Review section click on Create environment.
1.6. Wait a few seconds until your development environment is ready, you will see the following screen.

1.7. For this lab is required to see hidden files, click on preference icon and click on Show Hidden Files.

2. Create an IAM user with administrator privileges
2.1. Open the IAM console at https://console.aws.amazon.com/iam/.
2.2. Choose Users, then Add user.
2.3. Type a name for your user AmplifyWorkshopAdmin, choose Programmatic access and click Next: Permissions.

2.4. Click Attach permissions policies and select Administrator Access, choose Next: Tags.

2.5. For Add tags (optional) section choose Next: Review.
2.6. Click on Create user.
2.7. To save the credentials, choose Download .csv and then save the file to a safe location, and Close.

3. Configure your AWS CLI with your IAM credentials
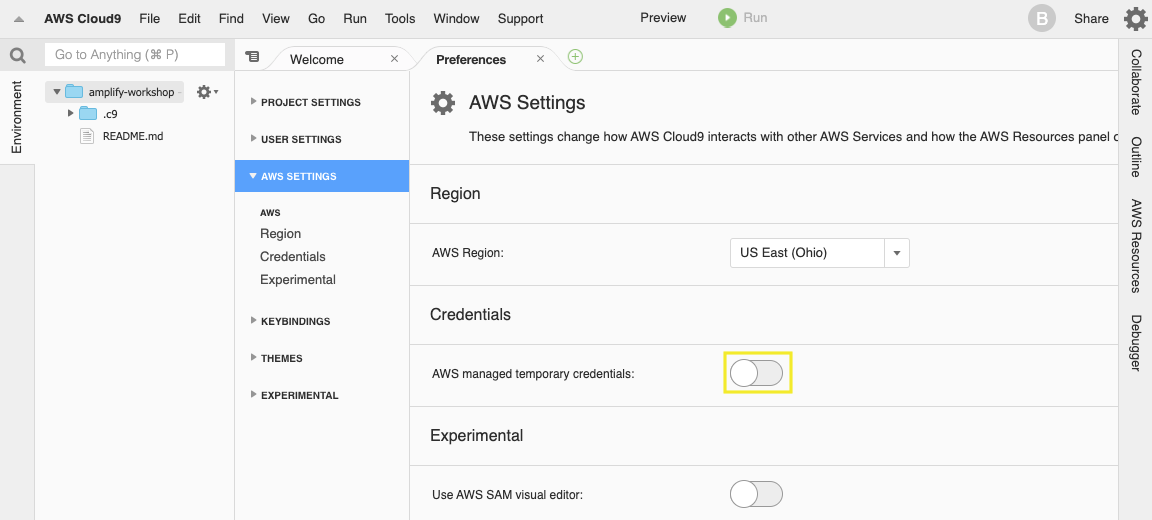
3.1. Inside the Cloud9 environment, click on AWS Cloud9 and Preferences.

3.2. Select AWS SETTINGS and turn off AWS managed temporary credentials.
3.3. In the bash terminal we are going to configure the AWS CLI as follows:
aws configure
- For this configuration use the values inside the credentials.csv file previously downloaded.
- AWS Access Key ID: (Type your Access key ID)
- AWS Secret Access Key: (Type your Secret access key)
- Default region name [None]: us-east-1 (Use your region code, all Regions)
- Default output format [None]: json

3.4. Remove aws_session_token variable from aws credentials.
sed -i 's/aws_session_token =//g' ~/.aws/credentials
4. Configure and run the base React application
4.1. Inside your environment folder clone the repository project from GitHub.
cd ~/environment/
git clone --single-branch --branch start https://github.com/aurbac/react-my-todos.git
cd react-my-todos
git branch master
git checkout master

4.2. Install the Node.js dependencies.
npm install
4.3. Run the project.
npm start

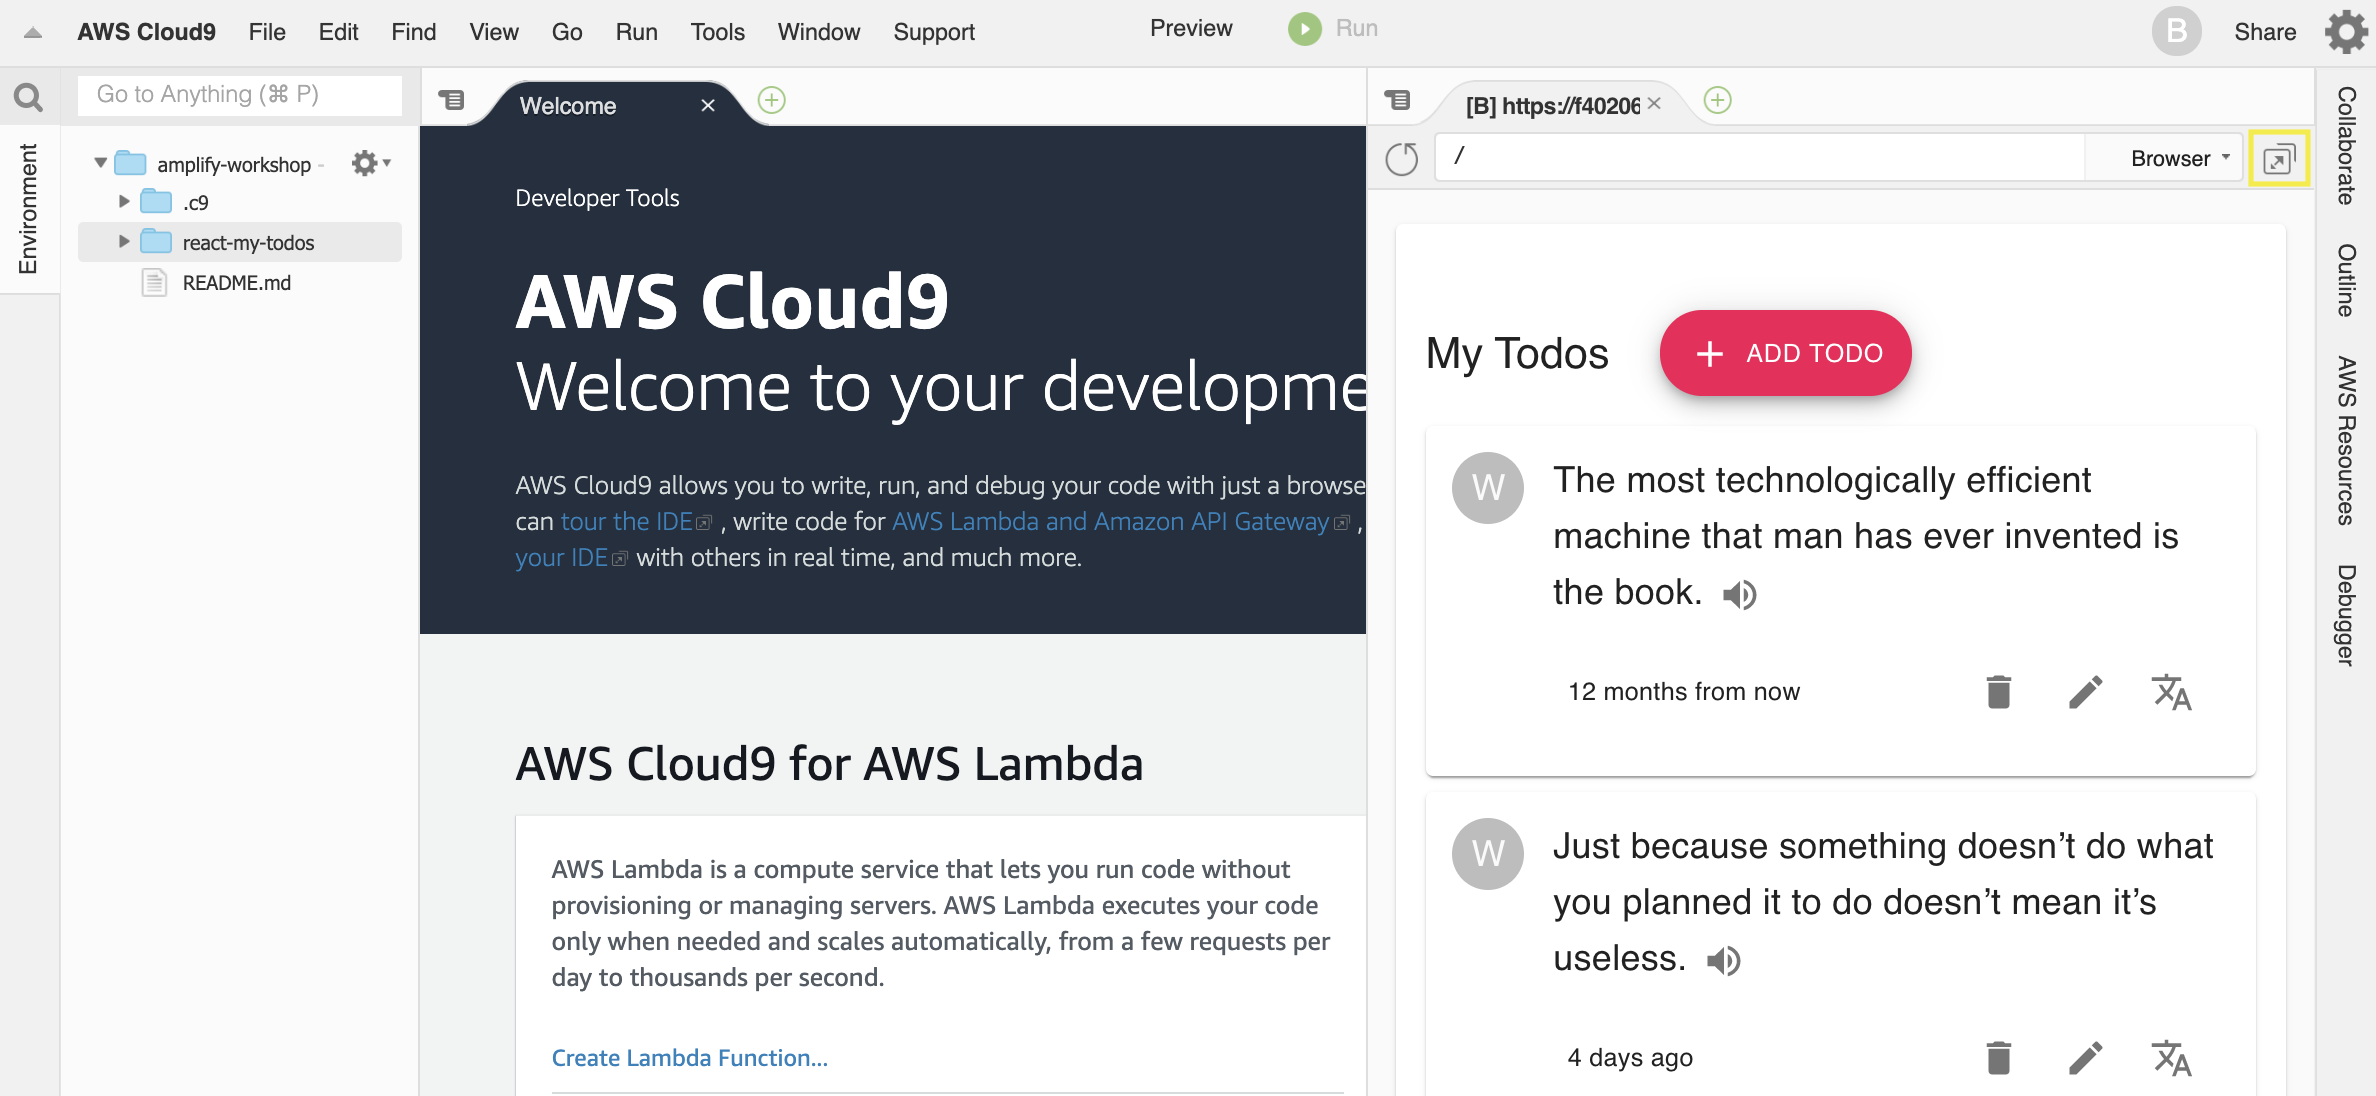
4.4. Once the web server has started, click the Preview menu and select Preview Running Application.

4.5. If you’d like, you can also pop the preview to a new window.
4.6. Finally, open another terminal window. We’ll leave this first terminal alone since it’s running the web server process.

5. Create an AWS CodeCommit repository
5.1. Open the CodeCommit console at https://console.aws.amazon.com/codesuite/codecommit/home.
5.2. On the Repositories page, choose Create repository.
5.3. On the Create repository page, in Repository name type react-my-todos and enter a Description, choose Create.

5.4. From the Clone URL drop down, select Clone HTTPS, you will use the URL copied later.

6. Using AWS CodeComit repository
6.1. Your AWS Cloud9 development environment already have IAM credentiales configured, use these credentials with the AWS CLI credential helper. Enable the credential helper by running the following two commands in the terminal of your Cloud9 environment.
git config --global credential.helper '!aws codecommit credential-helper $@'
git config --global credential.UseHttpPath true
6.2. Go inside react-my-todos folder and remove remote from git project.
cd ~/environment/react-my-todos/
git remote remove origin
6.3. Use your repository URL to add your new Git origin to your project, the following command add it depending of the AWS region that you are working on.
export MY_REGION=`aws configure get region`
git remote add origin https://git-codecommit.$MY_REGION.amazonaws.com/v1/repos/react-my-todos
6.4. Configure Git with your name and email.
git config --global user.name "Your Name"
git config --global user.email you@example.com
6.5. Adding, committing, and pushing files to the CodeCommit repository.
git add .
git commit -m "Preparing your development environment"
git push origin master
6.6. Now you can use the CodeCommit console to review the files in a repository or quickly read the contents of a file.
